Most photographers pack up the moment the sun disappears. Ten minutes later, the sky does something better. Blue hour — the twilight window either side of sunrise and sunset — turns ordinary fields, coastlines and rooftop views into quiet, low-contrast scenes with deep colour and very few distractions. It also asks more of your technique than golden hour ever does. The light is dim, the exposures run long, and the colour shifts minute by minute. What follows is how to plan the timing, choose the settings, and come home with files you don't have to fight in editing later.
What the Blue Hour Actually Is
You get two blue hours a day: one before sunrise, one after sunset. Neither lasts a full hour. The name describes the colour, not the clock.
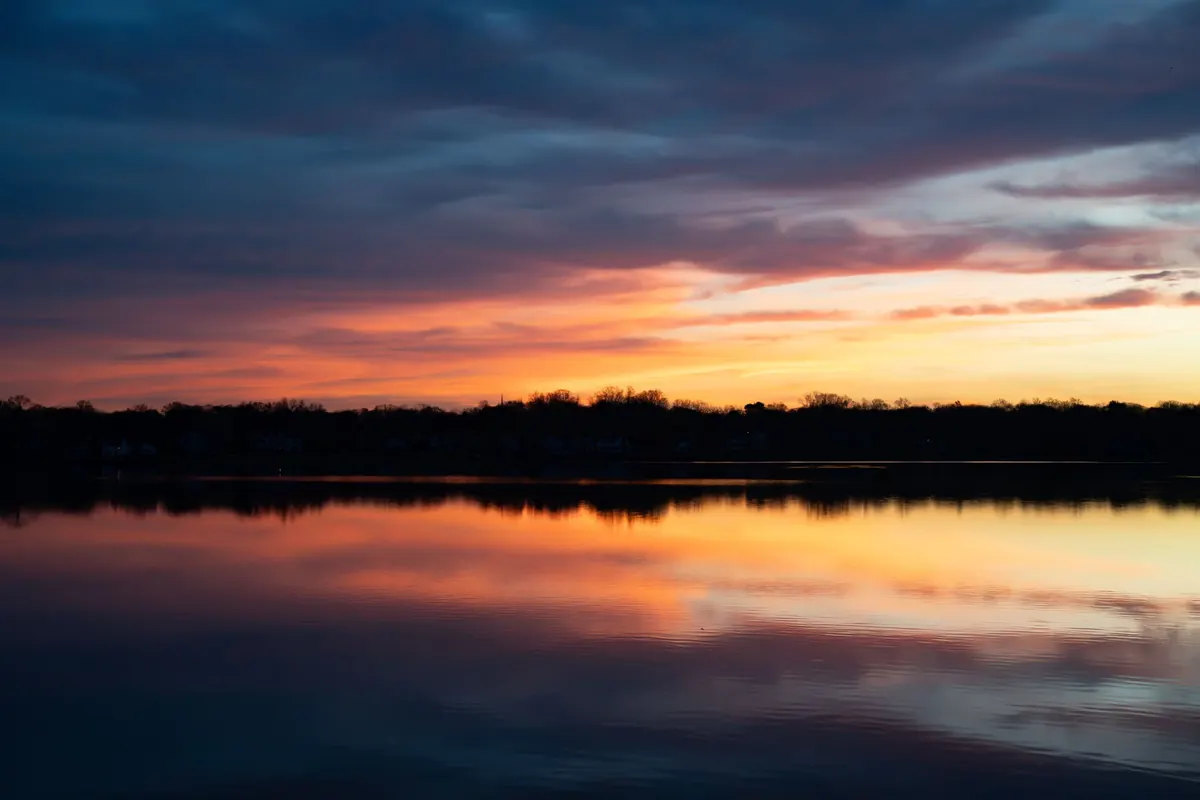
Photographically, the window opens when the sun is roughly four degrees below the horizon and runs until it's about eight or nine degrees down. That maps onto the tail end of civil twilight and the start of nautical twilight. At that point the sun's direct light is gone, but the atmosphere is still catching and scattering it, and what reaches your sensor is mostly cool, soft and even.
How long you get depends on where you are and when. Near the equator, twilight collapses in twenty minutes or less. In Scotland in June, or in Patagonia in December, the blue can stretch past an hour and a half. Sun-position apps such as PhotoPills, The Photographer's Ephemeris or Sun Surveyor will give you sunrise and sunset azimuths and twilight times for your exact spot — worth checking the night before rather than guessing in a car park.
Timing Your Window in the Field
Arrive early. Forty-five minutes before sunrise, or the same after sunset, is a comfortable buffer: enough time to walk to your viewpoint, set up, and make a couple of test frames while the light is still bright enough to see what you're doing.
As dusk unfolds, the colour moves in a predictable order. First the sky above the sun keeps a warm band. Then blue spreads from the top and the opposite horizon, deepening as the sun sinks. The most saturated blue usually sits away from the sunset, not behind it — so if you're only shooting the glowing side, you're missing the best of it. Turn around.
Then the artificial lights come on while the sky still holds a little blue, which is the sweet spot for towns, harbours and roads. Stars appear a few minutes later. If you can, stay past the blue hour entirely. The transition frames from blue to black are often the ones people remember.
A Sensible Starting Point for Settings
In dim, slowly changing light, manual mode removes the guesswork. Start here and adjust by eye:
- Exposure mode: Manual.
- ISO: 100, or 200–400 if wind or moving water is blurring more than you want.
- Aperture: f/8 to f/11. Sharp across the frame and easy to focus manually.
- Shutter speed: begin around two seconds and work longer as the sky darkens. Fifteen to thirty seconds is normal at the deepest blue.
- File format: Raw, always. You'll be lifting shadows and cooling or warming the whole image later.
- Release: two-second timer, cable release, or a phone app. Never your finger on the shutter button.
Meter in matrix or evaluative mode, then check the histogram rather than the LCD. Protect the brightest part of the sky — if the highlights clip, they're gone. Underexposing slightly and recovering the foreground in editing is the safer trade.
White Balance: Choose the Mood On Purpose
White balance does more than correct colour here; it decides whether the picture feels cold and still or warm and nostalgic. A daylight setting, around 5500K, preserves the natural blue. Setting a lower Kelvin value exaggerates it, steering the sky toward steel and indigo. A higher value, in the shade or cloudy range, warms the whole scene and can flatten the sky into a muddy grey-teal, though it does let artificial lights read as warm points.
Auto white balance is the one to avoid. It drifts between frames as the light fades, which ruins panoramas and timelapses, and it tends to neutralise exactly the colour you came for. Pick a fixed Kelvin value, shoot raw, and fine-tune later. If there's any warm light in the frame — sodium street lamps, a lit window, the last ember of sunset — deliberate warmth against a blue sky is the contrast that makes the shot.
Tripod Discipline and Long Exposure Craft
At two seconds and beyond, everything you get away with in daylight stops being free.
- Weight the tripod. Sandbag the legs or hang your bag from the hook. Skip the centre column; it's the least stable part of any setup.
- Turn off stabilisation. Image stabilisation and vibration reduction can hunt when the camera is locked down. Check your lens for a tripod mode if it has one.
- Focus manually. Autofocus struggles in the dark. Magnify live view on a contrasty edge — a rock, a branch, a distant light — or focus roughly a third into the scene for deep depth of field.
- Use an electronic shutter or mirror lock-up on cameras that offer it, and cover the eyepiece on DSLRs if stray light leaks in.
- Consider long exposure noise reduction. It halves your shooting rate because the camera takes a dark frame of equal length. Fine for one hero shot, painful for a sequence.
Dynamic range is the other battle. The sky may be several stops brighter than the land. Bracket three to five frames a stop or two apart and blend them later, or use a graduated neutral density filter if the horizon is reasonably flat. And watch the wind: at ten seconds, grass and branches turn to mush. Sometimes that's beautiful; sometimes you need a faster frame to blend in.
Subject Ideas That Suit Dim, Cool Light
- Still water. Long exposures smooth it completely, holding the sky's blue in a second, cleaner version.
- Silhouettes. Trees, headlands, fence posts and figures read cleanly against a bright twilight sky.
- Light trails. Traffic and moving water give the frame energy the sky doesn't have.
- Lonely details. A lit window, a jetty lamp, a single rock pool. Blue hour thrives on simplicity.
Your First Blue Hour Outing, Start to Finish
Scout in daylight so you're not hunting for a composition in the dark. Check the twilight times and the sun's direction, then arrive with time to spare. Set up, switch off stabilisation, focus manually, and take a test frame at ISO 1600 to confirm your composition before dropping to ISO 100. Fix your white balance, then shoot steadily through the whole transition — bright, deep, darker — varying your shutter speed as the light falls.
Back home, edit gently. Cool the shadows slightly, warm the highlights if there are any, and resist dragging the shadows so far that noise turns to mush. Blue hour images live on subtlety. The photographs that hold up are rarely the brightest ones; they're the ones where the blue was allowed to stay blue.
Photo: Cara Denison / Pexels