A junco lands on the feeder, you press the shutter, and the screen shows a grey smudge with a beak. Everyone starts there. The good news is that sharp backyard bird photos rarely depend on how much your lens cost. They come down to four decisions you can make this weekend: when you shoot, how fast your shutter fires, what your autofocus is pointed at, and where you sit.
Start With Light, Not Gear
Your yard's light matters more than your camera body. Walk outside one morning and note where the sun actually lands — most backyards are shaded for part of the day, and that shade is where soft, muddy photos come from. Position yourself so the light falls on the bird from behind you or slightly to one side, roughly 45 degrees. Front light gives you clean feather detail and a small catchlight in the eye; shooting straight into the sun leaves you with a silhouette and an autofocus system hunting for contrast.
Overcast days are genuinely useful. The light is even, colours stay rich, and there are no hard shadows across the bird's face. The trade-off is brightness: you'll pay for that softness with a higher ISO or a slower shutter. If you shoot from indoors, clean the glass, press the lens hood almost against it, and switch off the lights behind you so they don't reflect in the frame.
Shutter Speed: The Setting That Decides Sharpness
Both camera shake and bird movement cause blur, and the bird is almost always the bigger problem. Small songbirds twitch constantly — a head turn, a wing flick, a tail pump — and those movements happen in a fraction of a second. Set your shutter speed for the bird, not for your hands.
- Perched, calm, resting or preening: 1/400–1/640
- Hopping along a branch, feeding, quick head turns: 1/800–1/1000
- Landing, taking off, bathing, squabbling: 1/1600–1/3200
Use shutter priority or manual with Auto ISO and let the camera handle aperture and sensitivity. If your camera lets you set a minimum shutter speed for Auto ISO, set it to 1/1000 and forget it. On dark mornings you'll end up at a high ISO, and that's the right trade: a sharp frame with some grain is usable, a clean blurry frame is not. Try a test burst at 1/250 and again at 1/1250, then compare both at full size. Brace your elbows against your ribs or a railing, exhale slowly, and fire two or three frames rather than one. Image stabilisation helps with your own shake; it does nothing about the bird's.
Tell the Autofocus What to Care About
Wide-area autofocus is built for flying birds and unexpected movement, but in a backyard it locks onto the feeder, a twig, or the fence behind your subject. For perched birds, switch to a single point or a small zone and move it over the eye. Keep the camera in continuous autofocus (AF-C, or AI Servo on Canon bodies) rather than single-shot — a subject that is standing still right now will move the moment you press the button.
Eye detection is worth turning on if you have it, though through dense branches it can wander. If the eye is sharp, the photo reads as sharp even when the tail feathers soften. For birds in flight, go back to a wider zone or a tracking mode, follow the bird smoothly, and give it a little room in the frame ahead of its direction of travel.
Make the Perch the Subject, Not the Feeder
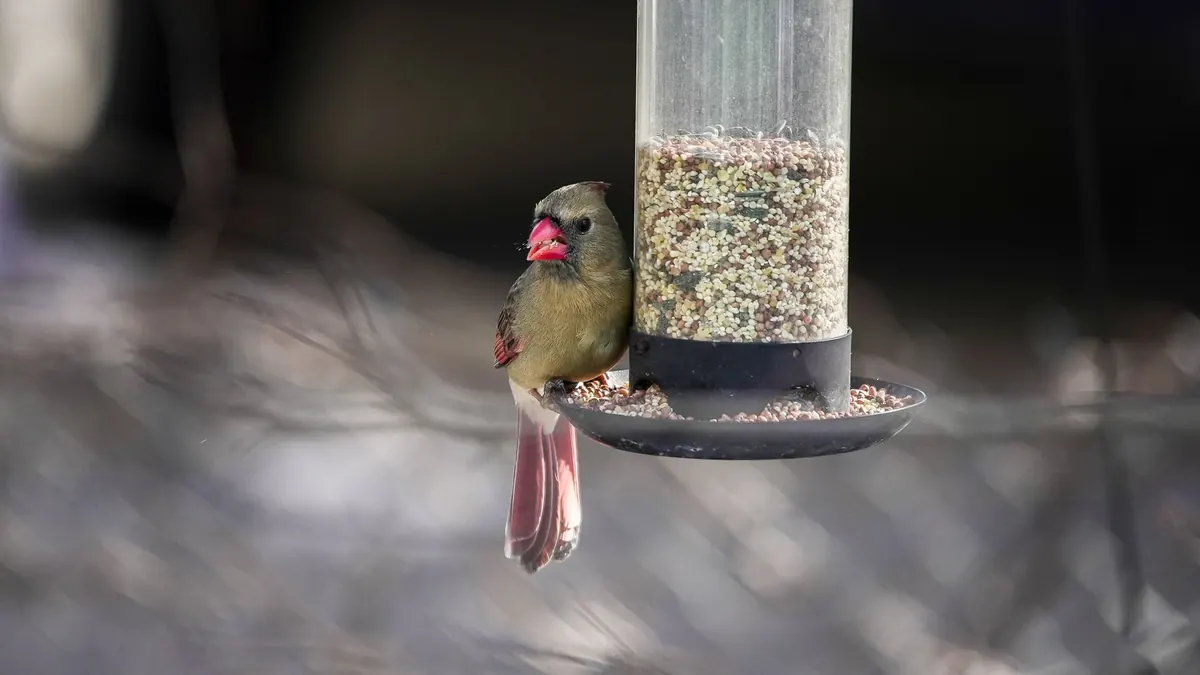
A feeder in the frame is a snapshot; a bird on a bare branch is a photograph. Set up a natural perch — a dead branch, a weathered post, a bundle of dry twigs — a foot or two above or beside the feeder. Birds almost always land on something before committing to the food, and that pause is your shot. They'll use the same perch again and again once they trust it.
Background control is mostly about distance. Place the perch with three to five metres of open air behind it and a messy hedge becomes a smooth wash of green. If your yard is tight, shoot from a lower angle so sky or a far fence fills the frame instead of the shed wall. A shallow birdbath is the best investment you can make: bathing and drinking are predictable, and birds sit still afterwards, feathers ruffled and eye bright.
Patience Is a Technical Skill
Birds run on routines, and learning them takes about fifteen minutes of watching without the camera in your hands. Which branch do they use as a staging post? Which direction do they approach from? How close do they let you get before they flick away? Sit still and low, with your back against a wall or fence, in muted colours. Move while the bird's head is turned away from you, and stop moving the moment it looks up.
The first hour after sunrise and the last hour before dark are the most productive. In winter, birds feed hard all day, and bare branches give you clean backgrounds instead of a wall of leaves. Above all, don't chase. Pick one perch, get comfortable, and let the birds come to you — an hour beside a good perch beats an afternoon spent walking the yard with a long lens.
Six Habits That Keep Photos Soft
- Shooting through a dirty window. Smudges destroy contrast and add haze. Clean the glass and get the lens close to it.
- Choosing shutter speed for your hands instead of the bird. If it can move, you need more speed.
- Leaving wide-area autofocus on. It will find the feeder before it finds the bird.
- Standing too close. Every step forward costs you the shot; back off and let the bird relax.
- Judging sharpness on the back screen. Zoom to 100 per cent and look at the eye.
- Shooting at midday in full sun. Overhead light flattens feather detail and leaves hard shadows under the wing.
Set Up Once, Then Sit Still
Pick one morning this week. Put a clean perch near the feeder with open space behind it. Set Auto ISO with a minimum shutter speed of 1/1000, a small focus zone, and continuous autofocus. Make a coffee, sit down, and give it half an hour. You'll miss the first few frames while you find the light and get the focus point where you want it. By the second morning you'll be anticipating the landing instead of reacting to it. That's the whole method with backyard birds: fewer settings changed, more time spent waiting.
Photo: Miro Vrlik / Pexels